Multitenancy
This article explains how to host multiple tenants or sites—each served from a different subdomain—within a single Next.js application. The backend and frontend run as separate serverless functions in one project, which keeps maintenance and deployment simple and reduces infrastructure complexity.

This guide walks you through implementing multitenancy in Next.js with a small assist from Vovk.ts. It shows how to serve different areas of your application under distinct subdomains, illustrating several use cases:
- example.com for the root tenant,
- admin.example.com for the admin tenant,
- customer.example.com for a customer tenant,
- *.customer.example.com for a specific customer tenant (for example,
acme.customer.example.com), - pro.*.customer.example.com for a professional version of a customer tenant (for example,
pro.acme.customer.example.com).
The live example is available at multitenant.vovk.dev , and the source code is in the vovk-multitenant-example .
Each tenant has its own root API endpoint under that domain’s /api path. For example, the customer tenant’s API lives at customer.example.com/api, and the admin tenant’s API at admin.example.com/api. These root endpoints are implemented as segments and rewritten at Next.js proxy to the appropriate path based on the tenant subdomain.
On the frontend, use Next.js dynamic routes for tenant‑specific paths. For example, a customer’s dedicated tenant page lives at src/customer/[customer_name]/page.tsx, and the admin tenant uses src/admin/page.tsx.
Vovk.ts provides a small routing utility, multitenant, that accepts request information and returns the action the proxy should take—redirecting to a subdomain or rewriting to a path. You’ll use it in Next.js proxy to route requests based on the tenant subdomain.
This example uses Vercel for deployment, but you can adapt it to any platform that supports Node.js.
Configure DNS
DNS records are configured as follows:
| Type | Host | Value |
|---|---|---|
| CNAME Record | *.multitenant | cname.vercel-dns.com. |
On Vercel, the project domains are configured like this:
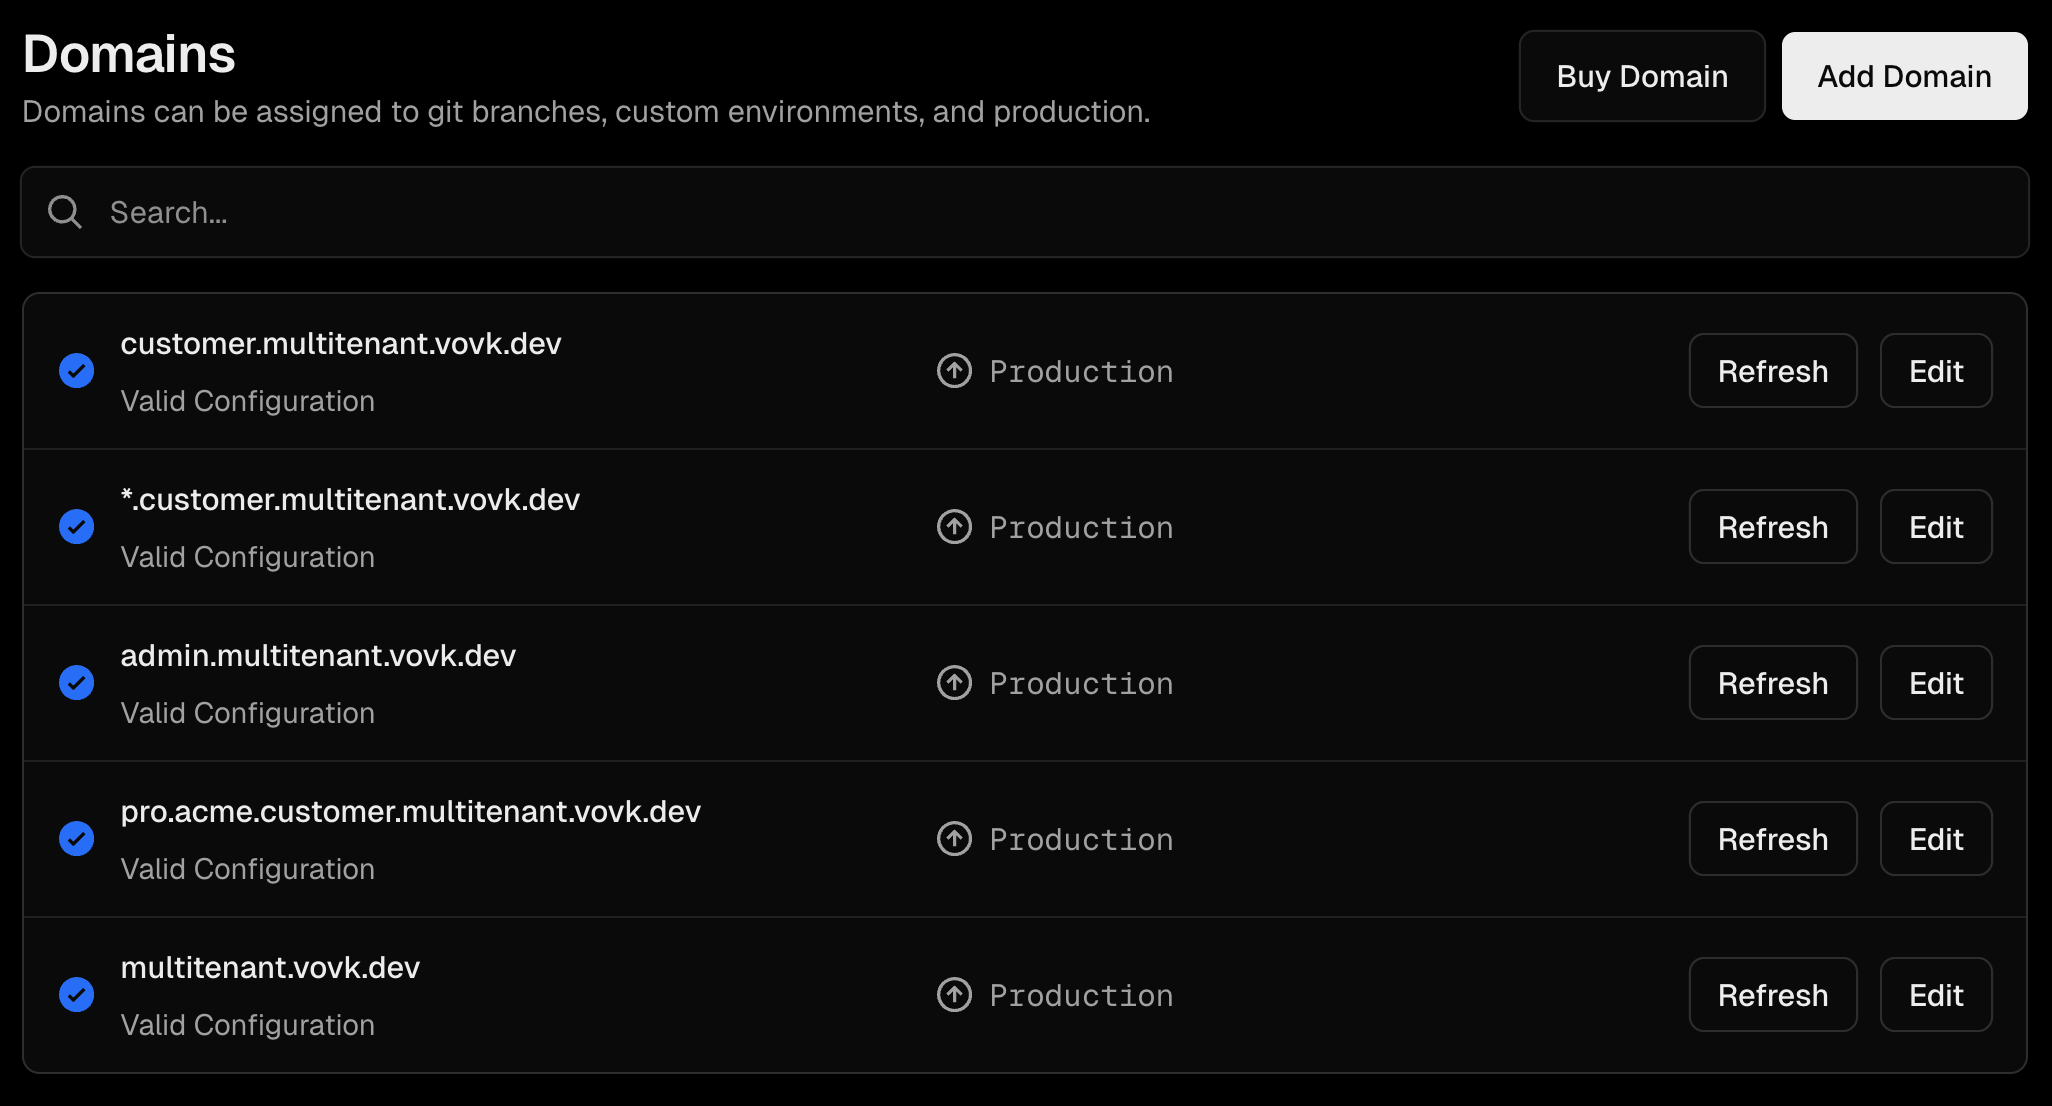
See the Vercel documentation for details on configuring domains, or consult your provider’s documentation for wildcard subdomains.
As it was mentioned above, the project uses the following domains:
multitenant.vovk.devfor the root tenant,admin.multitenant.vovk.devfor the admin tenant,customer.multitenant.vovk.devfor the customer tenant,*.customer.multitenant.vovk.devfor a specific customer tenant (for example,acme.customer.multitenant.vovk.dev), which shares the customer tenant API,pro.acme.customer.multitenant.vovk.devto illustrate multiple subdomains. Vercel has limited wildcard support, soacmeis used as a placeholder.
Organize Frontend Routes
Use Next.js dynamic routes to handle tenant‑specific paths.
- page.tsx domain: multitenant.vovk.dev, segment: "root"
- page.tsx domain: admin.multitenant.vovk.dev, segment: "admin"
- page.tsx domain: customer.multitenant.vovk.dev, segment: "customer"
- page.tsx domain: *.customer.multitenant.vovk.dev, segment: "customer"
- page.tsx domain: pro.*.customer.multitenant.vovk.dev, segment: "customer/pro"
Create Backend API Segments and Controllers
After setting up a Vovk.ts app, the simplest approach is to use the Vovk.ts CLI to create segments and controllers. The CLI generates the necessary files so you can focus on business logic.
First, create the API segments for each tenant. Each segment handles requests to its root API endpoint.
npx vovk new segment # create the root segment at src/app/api/[[...vovk]]/route.ts
npx vovk new segment admin # create "admin" segment at src/app/api/admin/[[...vovk]]/route.ts
npx vovk new segment customer # create "customer" segment at src/app/api/customer/[[...vovk]]/route.ts
npx vovk new segment customer/pro # create "customer/pro" segment at src/app/api/customer/pro/[[...vovk]]/route.tsRead more about Vovk.ts segments.
Next, create controllers for each segment. For example, to create ProductService and ProductController for the root segment in src/modules/product/:
npx vovk new controller service productCreate UserService and UserController for the admin segment in src/modules/admin/user/:
npx vovk new controller service admin/userEnable Segmented Client
By default, Vovk.ts emits a “composed client” to node_modules/.vovk-client, which is re‑exported from the "vovk-client" package. Those modules import all schemas from .vovk-schema, making the entire app schema visible in every frontend module that imports the client.
A segmented client solves this by generating a separate client per segment, importing only the schemas relevant to that segment. Each segment gets its own directory in the project, and the client imports only what it needs.
This also lets higher‑order segments (such as “admin”) import lower‑order segments (such as “customer”), enabling RPC sharing across segments while keeping backend details hidden from pages that don’t use those RPC modules.

Disable the composed client and enable the segmented client in your config file:
// @ts-check
/** @type {import('vovk').VovkConfig} */
const config = {
  composedClient: {
    enabled: false, // Disable composed client
  },
  segmentedClient: {
    enabled: true, // Enable segmented client
  },
};
export default config;
By default, the segmented client is generated in ./src/client. You can change the output directory via the outDir option.
Once enabled, import the client in your frontend code:
import { ProductRPC } from '@/client/product';

await ProductRPC.getProducts();
The generated client’s file structure looks like this (truncated for brevity—see segmented client docs for details):
- index.ts segment: root
- index.ts segment: admin
- index.ts segment: customer
- index.ts segment: customer/pro
Update Segment Configuration
Specify segmentNameOverride for every non‑root segment in the config file. This overrides the default segment name used in the URL path (for example, "customer/pro" becomes "").
// @ts-check
/** @type {import('vovk').VovkConfig} */
const config = {
  composedClient: {
    enabled: false, // Disable composed client
  },
  segmentedClient: {
    enabled: true, // Enable segmented client
  },
  outputConfig: {
    segments: {
      admin: {
        segmentNameOverride: '',
      },
      customer: {
        segmentNameOverride: '',
      },
      'customer/pro': {
        segmentNameOverride: '',
      },
    },
  },
};
export default config;
Create Next.js Proxy
The "vovk" package provides a multitenant utility that acts as the router for your multitenant app. It accepts request information and returns the action the proxy should take—redirect to a subdomain or rewrite to a path.
Parameters:
requestUrl: the full request URL (e.g., fromrequest.url).requestHost: the request host (e.g., fromrequest.headers.get("host")).targetHost: the canonical host for redirects/rewrites (your production domain orlocalhost:3000in development).overrides: a map from tenant subdomain names to routing rules. Each rule is an array of objects withfrom(path prefix) andto(target path).
For wildcard subdomains, use square‑bracket patterns (such as [customer_name]) to define the Dynamic Segment . The value is passed via params.
import { NextRequest, NextResponse } from 'next/server';
import { multitenant } from 'vovk';

export default function proxy(request: NextRequest) {
  const { action, destination, message, subdomains } = multitenant({
    requestUrl: request.url,
    requestHost: request.headers.get('host') ?? '',
    targetHost: process.env.VERCEL ? 'multitenant.vovk.dev' : 'localhost:3000',
    overrides: {
      admin: [
        // admin.multitenant.vovk.dev
        { from: 'api', to: 'api/admin' }, // API
        { from: '', to: 'admin' }, // UI
      ],
      customer: [
        // customer.multitenant.vovk.dev
        { from: 'api', to: 'api/customer' }, // API
        { from: '', to: 'customer' }, // UI
      ],
      '[customer_name].customer': [
        // *.customer.multitenant.vovk.dev
        { from: 'api', to: 'api/customer' }, // API
        { from: '', to: 'customer/[customer_name]' }, // UI
      ],
      'pro.[customer_name].customer': [
        // pro.*.customer.multitenant.vovk.dev
        { from: 'api', to: 'api/customer/pro' }, // API
        { from: '', to: 'customer/[customer_name]/pro' }, // UI
      ],
    },
  });

  console.log({
    action,
    destination,
    message,
    subdomains,
  });

  if (action === 'rewrite' && destination) {
    return NextResponse.rewrite(new URL(destination));
  } else if (action === 'redirect' && destination) {
    return NextResponse.redirect(new URL(destination));
  } else if (action === 'notfound') {
    return new NextResponse('Not Found', { status: 404 });
  }

  return NextResponse.next();
}

export const config = {
  matcher: [
    /*
     * Match all request paths except for the ones starting with:
     * - _next/static (static files)
     * - _next/image (image optimization files)
     * - favicon.ico, sitemap.xml, robots.txt (metadata files)
     * - SVG files
     */
    '/((?!static|.*\\.png|.*\\.svg|.*\\.ico|.well-known|_next/image|_next/static).*)',
  ],
};
Update Hosts for Local Development
Add a wildcard mapping to /etc/hosts to support subdomains locally:
127.0.0.1 *.localhostRoadmap
- 📝 Cover multi-domain topic.